

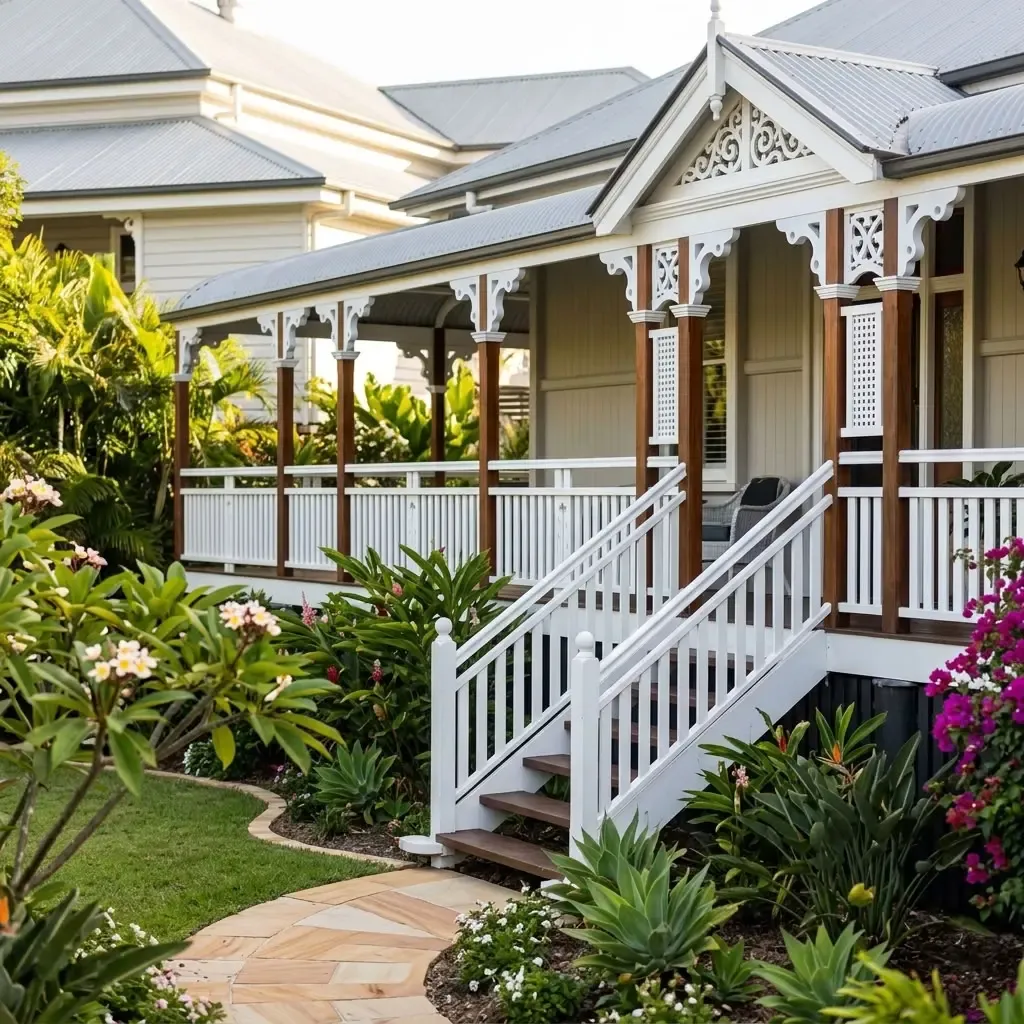
Few details say "heritage home" like a row of decorative brackets along a verandah. They sit in the corner where each post meets the beam, and together they give a Queenslander, Federation or cottage verandah its lacy, shaded character. When the brackets are missing, broken or mismatched, the whole frontage looks unfinished.
The short version: look at what your house had originally, choose a bracket in the same spirit, fit one either side of each post in line with the beam, and paint them to match your verandah trim. Ledro House verandah brackets are designed in Brisbane, made in Australia and fix with a hidden bracket, so there are no visible screws on the finished verandah.
Why brackets matter on a heritage verandah
- They finish the posts. A plain post meeting a plain beam looks stark. A bracket softens that corner and makes the post look designed, not just structural.
- They create rhythm. Repeated along the verandah, brackets give the frontage a pattern that reads from the street.
- They're part of the original style. Many Queenslanders and Federation homes were built with decorative brackets and fretwork, so restoring them brings the house back to how it was meant to look.
Step 1: Look at what the house had
Before you choose a style, look for clues to the original brackets:
- Old photos. Family photos, sale listings and local history groups often show the house before changes were made.
- Marks on the posts. Paint lines, old nail holes or filled screw holes near the top of the posts show where brackets once sat and roughly how big they were.
- Neighbouring houses. Homes built in the same street and era often shared similar details.
You don't need an exact copy of the original. The aim is a bracket that suits the period and the scale of the verandah.
Step 2: Choose a style that suits the era
Our verandah brackets are all designed with Australian heritage homes in mind:
- Ashgrove: a sweeping ogee curve, end scroll and twin roundels. Named after one of Brisbane's best-loved heritage suburbs, it's the classic Queenslander bracket.
- Floral: soft, petal-like cut-outs with a decorative feel that suits Federation homes and cottages.
- Wheel: spoke-style openings inspired by a wagon wheel, a traditional look that suits Queenslanders and country homes.
- Harp: a curved profile with vertical slats. A simpler heritage look that also works on more restrained or modern verandahs.

Step 3: Check the size and how many you need
Ledro House verandah brackets come in one size per style, between 245mm and 255mm high and wide and 40mm deep. Each product page lists the exact size. That suits the posts and beams on most Australian verandahs, but it's worth holding a piece of card cut to that size up in the corner of a post to see how it looks before you order.
Most verandahs use a pair of brackets on each post, one either side, running in line with the beam. Count your posts, double it, and add any corner posts or end posts that need brackets on a second face.
Step 4: Paint before you fit
Verandah brackets need to be painted, just like our post tops. Use a good quality exterior paint, such as Dulux Weathershield, in your verandah trim colour. No sanding or primer is needed. Painting before installation is much easier than painting around the cut-outs once they're up, and once painted they're suitable for Australian conditions.
Classic heritage choices are white or cream brackets against a white post, or brackets picked out in the house's trim colour. Our colour guide has ideas for matching the fence and verandah.
Step 5: Install with the hidden bracket
Every Ledro House verandah bracket comes with a hidden mounting bracket, so nothing shows on the finished verandah:
- Fix the hidden bracket. Screw the mounting bracket into the corner where the post meets the beam.
- Lock on the decorative bracket. The painted verandah bracket locks onto the mounting bracket, covering it completely.
- Seal the edge. Run a bead of exterior-grade silicone around the outside edge to lock it firmly in place.

There are no screw holes in the face of the bracket to fill and touch up, which keeps the detail crisp, just as the original brackets would have looked.
A note on heritage areas
If your home is in a heritage or character area, your council may have guidelines for changes to the front of the house. Restoring brackets is usually welcome, but it's worth checking before you start.
Quick answers
What are verandah brackets for?
They're decorative brackets fitted in the corner between a verandah post and the beam. They finish the post and give the verandah its heritage character.
How many verandah brackets do I need?
Usually two per post, one either side in line with the beam, plus extras for corner posts.
Do verandah brackets need to be painted?
Yes. Paint them with a good quality exterior paint such as Dulux Weathershield before installing. No sanding or primer needed.
Will I see screws?
No. Ledro House brackets lock onto a hidden mounting bracket, so no fixings show.
Restore your verandah
Ledro House verandah brackets are designed in Brisbane, made in Australia and ready to paint to match your home. Browse the verandah bracket range, including the Ashgrove, Floral, Wheel and Harp, and give your verandah back its character.